Topics on this page
Set up the Workload Security firewall
The Workload Security Firewall is a highly flexible Firewall that you can configure to be restrictive or permissive. Like the intrusion prevention and web reputation modules, the Firewall module can also be run in two modes: inline or tap. It is recommended that you test your Firewall rules in tap mode and then switch to inline mode when everything is working correctly.
The configuration and administration of your Firewall must be performed carefully and there is no one set of rules that fits all environments. Make sure you understand the Firewall rule actions and rule priorities before creating your rules and proceed with extra caution when creating Allow rules because they implicitly deny everything else not defined.
Test Firewall rules before deploying them
The Firewall module (as well as the intrusion prevention and web reputation modules) includes a Workload Security network engine that decides whether to block or allow packets. For the Firewall and intrusion prevention modules, the network engine performs a packet sanity check and also makes sure each packet passes the Firewall and intrusion prevention rules. The network engine operates in one of two modes:
- Tap mode: Packet streams are not modified. The traffic is still processed by the Firewall and/or intrusion prevention modules, if they are enabled. However any issues detected do not result in packet or connection drops. When in Tap mode, Workload Security offers no protection beyond providing a record of events.
- Inline mode: Packet streams pass directly through the Workload Security network engine. All rules are applied to the network traffic before they proceed up the protocol stack.
It is important to test your Firewall rules in either Tap mode or Inline mode with the action for the rules set to Log Only before deploying them. This allows you to preview the effect of the rules on traffic, without any action being taken. If rules are not properly tested before deployment, all traffic could become blocked and your computer could become inaccessible.
Test in Tap mode
Tap mode allows you to test your Firewall rules, without disturbing the flow of traffic.
- Go to Computers or Policies in the Workload Security console.
- Right-click a computer (or policy) and select Details to open the Computer or Policy editor.
- Go to Settings > Advanced > Network Engine Mode.
- Select Tap from the list and click Save.
- Create your rules and click OK.
- To check your rules, go to Events & Reports > Events > Firewall Events.
It is not necessary to set the action of the rule to Log Only in Tap mode.
Once you are satisfied with your Firewall rules, go back to the Computer or Policy editor, select Inline from the list, and click Save.
Test in Inline mode
In most situations, Tap mode is a good way to test your Firewall rules without disturbing traffic. However, you can also test your rules in Inline mode, if the action of the rule is set to Log Only. This way, the real world process of analyzing the traffic takes place without having to perform any action, such as blocking or denying packets.
- Go to Computers or Policies in the Workload Security console.
- Right-click a computer (or policy) and select Details to open the Computer or Policy editor.
- Go to Settings > Advanced > Network Engine Mode.
- Select Inline from the menu and click Save.
- While you are creating your rule, ensure the action is set to Log Only.
- To check your rules, go to Events & Reports > Events > Firewall Events.
Once you are satisfied with your Firewall rules, change the action from Log Only to your desired action and click OK.
Enable fail open behavior
In some cases, the network engine blocks packets before the Firewall rules (or intrusion prevention rules) can be applied. By default, the network engine blocks packets if the following occurs:
- The agent or virtual appliance has a system problem, such as if it is out of memory.
- The packet sanity check fails.
This fail closed behavior offers a high level of security: it ensures that cyber attacks cannot penetrate your network when an agent or virtual appliance is not functioning properly and safeguards against potentially malicious packets. The disadvantage to fail closed is that your services and applications might become unavailable because of problems on the agent or virtual appliance. You might also experience performance issues if a large number of packets are dropped unnecessarily as a result of the packet sanity check (too many false-positives).
If you have concerns about service availability, consider changing the default behavior to allow packets through (or fail open) for system and packet check failures;
- Go to Computers or Policies in the Workload Security console.
- Right-click a computer (or policy) and select Details to open the Computer or Policy editor.
- Click Settings on the left.
- Select the Advanced tab.
- Under Network Engine Settings, set the Failure Response settings as per the following guidelines:
- Set Network Engine System Failure to Fail open to allow packets through if the Workload Security network engine experiences problems, such as out-of-memory failures, allocated memory failures, and network engine deep packet inspection (DPI) decoding failures. Consider using fail open here if your agent or virtual appliance frequently encounters network exceptions because of heavy loads or a lack of resources. With fail open, the network engine allows the packet through, does not perform Intrusion Prevention rules checking, and logs an event. Your services and applications remain available despite the problems on the agent or virtual appliance.
-
Set Network Packet Sanity Check Failure to Fail open to allow packets through that fail the network engine's packet sanity checks. Examples of packet sanity checks are Firewall sanity checks, network layer 2, 3, or 4 attribute checks, and TCP state checks. Consider using fail open here if you want to perform Intrusion Prevention rules checking only on good packets that pass the sanity check. With fail open, the network engine allows the failed packet through, does not perform Intrusion Prevention rules checking on it, and logs an event.
-
Click Save.
You have now enabled fail open behavior for system or packet check failures.
Turn on Firewall
To enable Firewall functionality on a computer:
-
In the Computer or Policy editor, go to Firewall > General.
For information on enabling Firewall for containers, see Apply your firewall settings.
-
Select On.
-
Click Save.
When you enable the Workload Security Firewall with at least one firewall rule, the Agent disables the Windows Firewall automatically to prevent conflicts.
Default Firewall rules
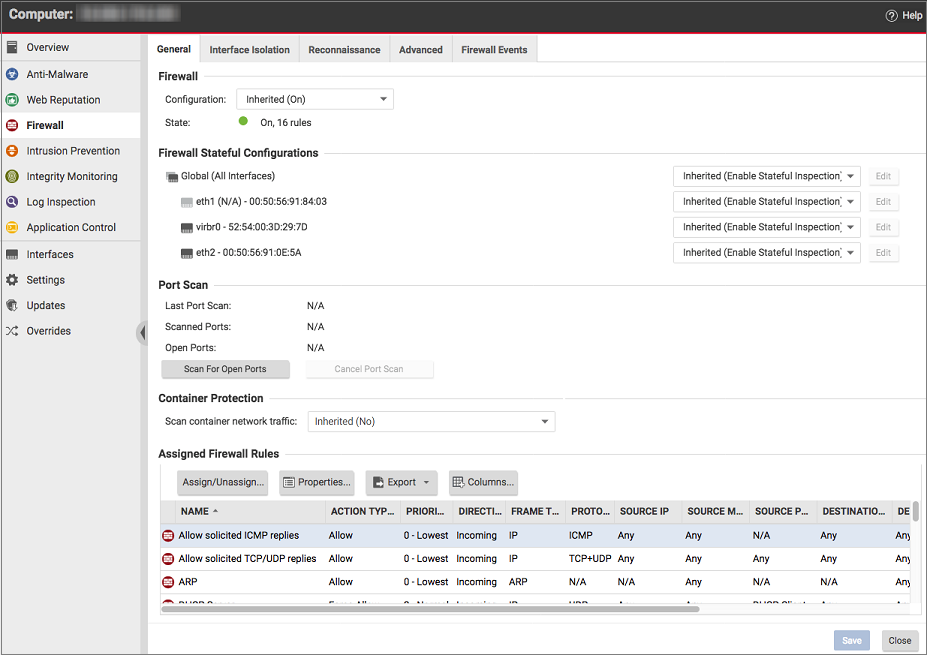
No outbound rules are assigned to the policies that come with Workload Security by default but several recommended inbound rules are. You can view the default inbound rules assigned to each policy by going to the Firewall tab in the relevant operating system policy. The example below shows the default assigned Firewall rules for the Windows 10 Desktop policy. You can configure these Firewall rules to meet the needs of your environment, but Trend Micro has provided several default rules for you to get started.
To minimize the impact on system performance, try not to assign more than 300 Firewall rules. It is also good practice to document all Firewall rule changes in the Description field of the Firewall rule. Make a note of when and why rules were created or deleted for easier Firewall maintenance.
Default Bypass rule for Workload Security Traffic
Workload Security automatically implements a Priority 4 Bypass Rule that opens the listening port number of the agent for heartbeats on computers running the agent. A priority of 4 ensures that this rule is applied before any Deny rule, and Bypass guarantees that the traffic is never impaired. The Bypass rule is not explicitly shown in the Firewall rule list because the rule is created internally.
This rule, however, accepts traffic from any IP address and any MAC address. To harden the agent's listening ports, you can create an alternative, more restrictive, Bypass rule for this port. The agent overrides the default Workload Security traffic rule with the new custom rule if it has these settings:
- Priority: 4 - Highest
- Packet direction: Incoming
- Frame type: IP
- Protocol: TCP
- Packet Destination Port: Agent's listening port for heartbeats
The custom rule must use the above parameters to replace the default rule. Ideally, the IP address or MAC address of Workload Security should be used as the packet source for the rule.
Restrictive or permissive Firewall design
Typically, Firewall policies are based on one of two design strategies. Either they permit any service unless it is expressly denied or they deny all services unless expressly allowed. It is best practice to decide what type of Firewall you would like to implement. This helps reduce administrative overhead in terms of creating and maintaining the rules.
Restrictive Firewall
A restrictive Firewall is the recommended best practice from a security perspective. All traffic is stopped by default and only traffic that has been explicitly allowed is permitted. If the primary goal of your planned Firewall is to block unauthorized access, the emphasis needs to be on restricting rather than enabling connectivity. A restrictive Firewall is easier to maintain and more secured. Allow rules are used only to permit certain traffic across the Firewall and deny everything else.
As soon as you assign a single outgoing Allow rule, the outgoing Firewall starts operating in restrictive mode. This is also true for the inbound Firewall: as soon as you assign a single incoming Allow rule, the inbound Firewall starts operating in restrictive mode.
Permissive Firewall
A permissive Firewall permits all traffic by default and only blocks traffic believed to be malicious based on signatures or other information. A permissive Firewall is easy to implement but it provides minimal security and requires complex rules. Deny rules are used to explicitly block traffic.
Firewall rule actions
You can configure the Firewall to take the following actions:
If you assign only incoming rules, all outgoing traffic is be allowed. If you assign a single outgoing Allow rule, the outgoing Firewall operates in restrictive mode. There is one exception to this: ICMPv6 traffic is always permitted unless it is specifically blocked by a Deny rule.
| Allow | Explicitly allows traffic that matches the rule to pass and then implicitly denies everything else.
You should use an Allow action with caution because it implicitly denies everything else not defined. Be careful when creating Allow rules without defining the related rules correctly because doing so can cause all traffic to be blocked except for the traffic that the Allow rule is created for. Traffic that is not explicitly allowed by an Allow rule is dropped and gets recorded as a Out of "allowed" Policy Firewall event. |
| Bypass | Allows traffic to bypass both Firewall and intrusion prevention analysis. Bypass rules should always be created in pairs (for both incoming and outgoing traffic). A Bypass rule can be based on IP, port, traffic direction, and protocol.
The Bypass rule is designed for media-intensive protocols or traffic originating from trusted sources. |
| Deny | Explicitly blocks traffic that matches the rule. |
| Force Allow | If a packet matches a force allow rule, it is passed but still filtered by intrusion prevention. No events are logged.
This type of Firewall rule action must be used for UDP and ICMP traffic. |
| Log only | Traffic is only be logged. No other action is be taken. |
For more information, see Create a Firewall rule.
Firewall rule priorities
Rule priority determines the order in which filters are applied. This means that high priority rules get applied before low priority rules. When actions share the same priority, the orders of precedence for rules are: Bypass, Force Allow, and then Deny. However, a Deny action with a higher priority takes precedence over a Bypass action with a lower priority. For more information on how rule priorities and actions determine processing order, see Firewall rule actions and priorities.
To simplify the administration of Firewall rules, consider reserving certain priority levels for specific actions. For example, apply a default of priority 3 to rules that use Bypass, priority 2 for Force Allow rules, and priority 1 for Deny rules. This reduces the potential for rule conflicts.
Allow rules
Allow rules can only have a priority of 0. This is to ensure it is processed after all Force Allow and Deny rules at higher priorities. Keep this in mind when using Allow rules to implicitly deny traffic (any traffic not matching the Allow rules is denied). This means that when a Deny rule is assigned, it takes precedence over all of the existing assigned Allow rules.
Force Allow rules
Force Allow rules are recommended for traffic that must always be allowed, such as Address Resolution Protocol (ARP). The Force Allow action only acts as a trump card to a deny rule at the same or higher priority. For example, if you have a Deny rule at priority 3 that prevents access to an allowed port number from the 10.0.0.0/8 subnet, and you want to allow host 10.102.12.56 to access that, you must create a Force Allow rule at priority 3 or 4 to trump the Deny rule at priority 3. Once a packet triggers this rule, it is immediately allowed and the lower priority rules do not process it anymore.
Bypass rules
The Bypass rule is a special type of rule that allows a packet to bypass both the Firewall and Deep Packet Inspection (DPI) engines. This rule must be priority 4 and created in pairs, one rule for each traffic direction.
Recommended Firewall policy rules
You should make the following rules mandatory for all of your Firewall policies:
- ARP: Allows incoming ARP requests so that the computer can reply to queries for its MAC address. If you do not assign this rule, no devices on the network can query the host for its MAC address and it becomes inaccessible from the network.
- Allow solicited TCP/UDP replies: Allows the computer to receive replies to its own TCP connections and UDP messages. This works in conjunction with TCP and UDP stateful Firewall configuration.
- Allow solicited ICMP replies: Allows the computer to receive replies to its own ICMP messages. This works in conjunction with ICMP stateful Firewall configuration.
- DNS Server: Allows DNS servers to receive inbound DNS queries.
- Remote Access RDP: Allows the computer to accept Remote Desktop connections.
- Remote Access SSH: Allows the computer to accept SSH connections.
Test Firewall rules
Before continuing with further Firewall configuration steps, test the recommended Firewall rules to ensure they are working correctly.
Test the remote access SSH rule:
- Try to establish a SSH connection to the computer. If the Firewall is enabled and the Remote Access SSH rule is not enabled, the connection is be denied. Go to Events & Reports > Firewall Events to view the denied event.
- Go to the Computer or Policy editor > Firewall. Under Assigned Firewall Rules, click Assign/Unassign.
- Search for Remote Access SSH and enable the rule, then click OK and Save.
- Try to establish a SSH connection to the computer. The connection should be allowed.
Test the remote access RDP rule:
- Try to establish a RDP connection to the computer. If the Firewall is enabled and the Remote Access RDP rule is not enabled, the connection is denied. Go to Events & Reports > Firewall events to view the denied event.
- Go to the Computer or Policy editor > Firewall. Under Assigned Firewall Rules, click Assign/Unassign.
- Search for Remote Access RDP and enable the rule, then click OK and Save.
- Try to establish a RDP connection to the computer. The connection should be allowed.
Reconnaissance scans
You can configure the Firewall to detect possible reconnaissance scans and help prevent attacks by blocking traffic from the source IPs for a period of time. Once an attack has been detected, you can instruct agents and appliances to block traffic from the source IPs for a period of time. Use the Block Traffic lists on the on the Policy or Computer Editor > Firewall > Reconnaissance tab to set the number of minutes.
- Computer OS Fingerprint Probe: The agent or appliance detects an attempt to discover the computer's OS.
- Network or Port Scan: The agent or appliance reports a network or port scan if it detects that a remote IP is visiting an abnormal ratio of IPs to ports. Typically, an agent or appliance computer only sees traffic destined for itself, so a port scan is the most common type of probe detected. The statistical analysis method used in computer or port scan detection is derived from the TAPS algorithm proposed in the document "Connectionless Port Scan Detection on the Backbone" presented at IPCCC in 2006.
- TCP Null Scan: The agent or appliance detects packages with no flags set.
- TCP SYNFIN Scan: The agent or appliance detects packets with only the SYN and FIN flags set.
- TCP Xmas Scan: The agent or appliance detects packets with only the FIN, URG, and PSH flags set or a value of 0xFF (every possible flag set).
For each type of attack, the agent or appliance can be instructed to send the information to Workload Security, where an alert is triggered by selecting the option Notify DSM Immediately. For this option to work, the agents and appliances must be configured for agent or appliance-initiated or bidirectional communication in Policy / Computer Editor > Settings > General > Communication Direction. If enabled, the agent or appliance initiates a heartbeat to Workload Security immediately upon detecting the attack or probe.
If you want to enable reconnaissance protection, you must also enable the Firewall and stateful inspection on the Policy or Computer editor Firewall > General tab. You should also go to the Policy or Computer editor Firewall > Advanced tab and enable the Generate Firewall Events for packets that are Out of Allowed Policy setting. This generates Firewall events that are required for reconnaissance.
The reconnaissance scans detection requires there to be at least one active Firewall rule assigned to the policy of the agent.
For information on how to handle reconnaissance warnings, see Warning: Reconnaissance Detected.
Stateful inspection
Workload Security Firewall stateful configuration mechanism should be enabled when the Firewall is enabled. This mechanism analyzes each packet in the context of traffic history, correctness of TCP and IP header values, and TCP connection state transitions. In the case of stateless protocols like UDP and ICMP, a pseudo-stateful mechanism is implemented based on historical traffic analysis.
Packets are handled by the stateful mechanism as follows:
- A packet is passed to the stateful routine if it has been allowed through by the static Firewall rule conditions.
- The packet is examined to determine whether it belongs to an existing connection.
- The TCP header is examined for correctness (for example, sequence numbers, flag combinations, and so on).
The Workload Security Firewall stateful configuration enables protection against attacks such as denial of service, provided that a default configuration with stateful TCP, ICMP, or UDP protocol is enabled and only solicited replies are allowed. If the UDP stateful option is enabled, Force Allow must be used when running UDP servers (for example, DHCP). If there is no DNS or WINS server configured for the agents, a Force Allow Incoming UDP Ports 137 rule might be required for NetBIOS.
Stateful logging should be disabled unless required for ICMP or UDP protocols.
Example
You can create a basic Firewall policy for a web server by following this example:
- Enable stateful inspection for TCP, UDP, and ICMP using a global Firewall stateful configuration with these options enabled.
-
Add a Firewall rule to allow TCP and UDP replies to requests originated on the workstation. To do this, create an incoming Allow rule with the protocol set to TCP + UDP and select Not and Syn under Specific Flags. At this point the policy only allows TCP and UDP packets that are replies to requests initiated by a user on the workstation. For example, in conjunction with the stateful analysis options enabled in step 1, this rule allows a user on this computer to perform DNS lookups (via UDP) and to browse the Web via HTTP (TCP).
-
Add a Firewall rule to allow ICMP replies to requests originated on the workstation. To do this, create an incoming Allow rule with the protocol set to ICMP and select the Any Flags check box. This means that a user on this computer can ping other workstations and receive a reply, but other users cannot ping this computer.
-
Add a Firewall rule to allow incoming TCP traffic to port 80 and 443 with the Syn enabled in the Specific Flags section. This means that external users can access a Web server on this computer.
At this point you have a basic Firewall policy that allows solicited TCP, UDP and ICMP replies and external access to the Web server on this computer all other incoming traffic is denied.
For an example of how Deny and Force Allow rule actions can be used to further refine this policy consider how you may want to restrict traffic from other computers in the network. For example, you may want to allow access to the Web server on this computer to internal users but deny access from any computers that are in the DMZ. This can be done by adding a Deny rule to prohibit access from servers in the DMZ IP range.
-
Add a Deny rule for incoming TCP traffic with source IP 10.0.0.0/24 which is the IP range assigned to computers in the DMZ. This rule denies any traffic from computers in the DMZ to this computer.
You may, however, want to refine this policy further to allow incoming traffic from the mail server which resides in the DMZ.
-
Use a Force Allow for incoming TCP traffic from source IP 10.0.0.100. This Force Allow overrides the Deny rule you created in the previous step to permit traffic from this one computer in the DMZ.
Important considerations
- All traffic is first checked against Firewall rules before being analyzed by the stateful inspection engine. If the traffic clears the Firewall rules, the traffic is then analyzed by the stateful inspection engine (provided stateful inspection is enabled in the Firewall Stateful Configuration).
- Allow rules are prohibitive. Anything not specified in the Allow rules is automatically dropped. This includes traffic of other frame types so you need to remember to include rules to allow other types of required traffic. For example, do not forget to include a rule to allow ARP traffic if static ARP tables are not in use.
- If UDP stateful inspection is enabled a Force Allow rule must be used to allow unsolicited UDP traffic. For example, if UDP stateful inspection is enabled on a DNS server then a Force Allow for port 53 is required to allow the server to accept incoming DNS requests.
- If ICMP stateful inspection is enabled a Force Allow rule must be used to allow unsolicited ICMP traffic. For example, if you wish to allow outside ping requests a Force Allow rule for ICMP type 3 (Echo Request) is required.
- A Force Allow acts as a trump card only within the same priority context.
- If you do not have a DNS or WINS server configured (which is common in test environments) a Force Allow incoming UDP port 137 rule may be required for NetBIOS (Windows shares).
When troubleshooting a new Firewall policy, the first thing you should do is check the Firewall rule logs on the agent or appliance. The Firewall rule logs contain all the information you need to determine what traffic is being denied so that you can further refine your policy as required.