Topics on this page
Trend Vision One extended detection and response (XDR) file collection
File collection lets you collect objects directly from the Trend Vision One extended detection and response (XDR) interface.
If you connect your agents and relays to the primary security update source via a proxy, file collection automatically uses the same proxy settings.
Requirements
- Install the agent version 20.0.0-2204 or later for Windows or Linux
- Register with Trend Micro Vision One extended detection and response (XDR)
- Forward security events to Trend Micro Vision One extended detection and response (XDR)
- Enable Activity Monitoring
Workload Security uses an IoT mechanism to transmit messages and events to Trend Vision One. If you need to restrict the URLs allowed in your environment, configure your firewall to include the Event Channel - XDR Activity Monitoring FQDNs from the Workload Security URLs table.
Collect objects using file collection
To collect objects using file collection:
Trigger file collection
After identifying the object that you want to collect, you can trigger file collection from either of the following:
From the Trend Vision One Search App  :
:
- Right-click on one of the following from Search App events:
- processFilePath
- objectFilePath
- parentFilePath
- Select Collect File.

The Collect File Task window appears.
From the Trend Vision One Workbench (under XDR  ):
):
Right-click the file icon ![]() for the object you want to collect and select Collect File.
for the object you want to collect and select Collect File.
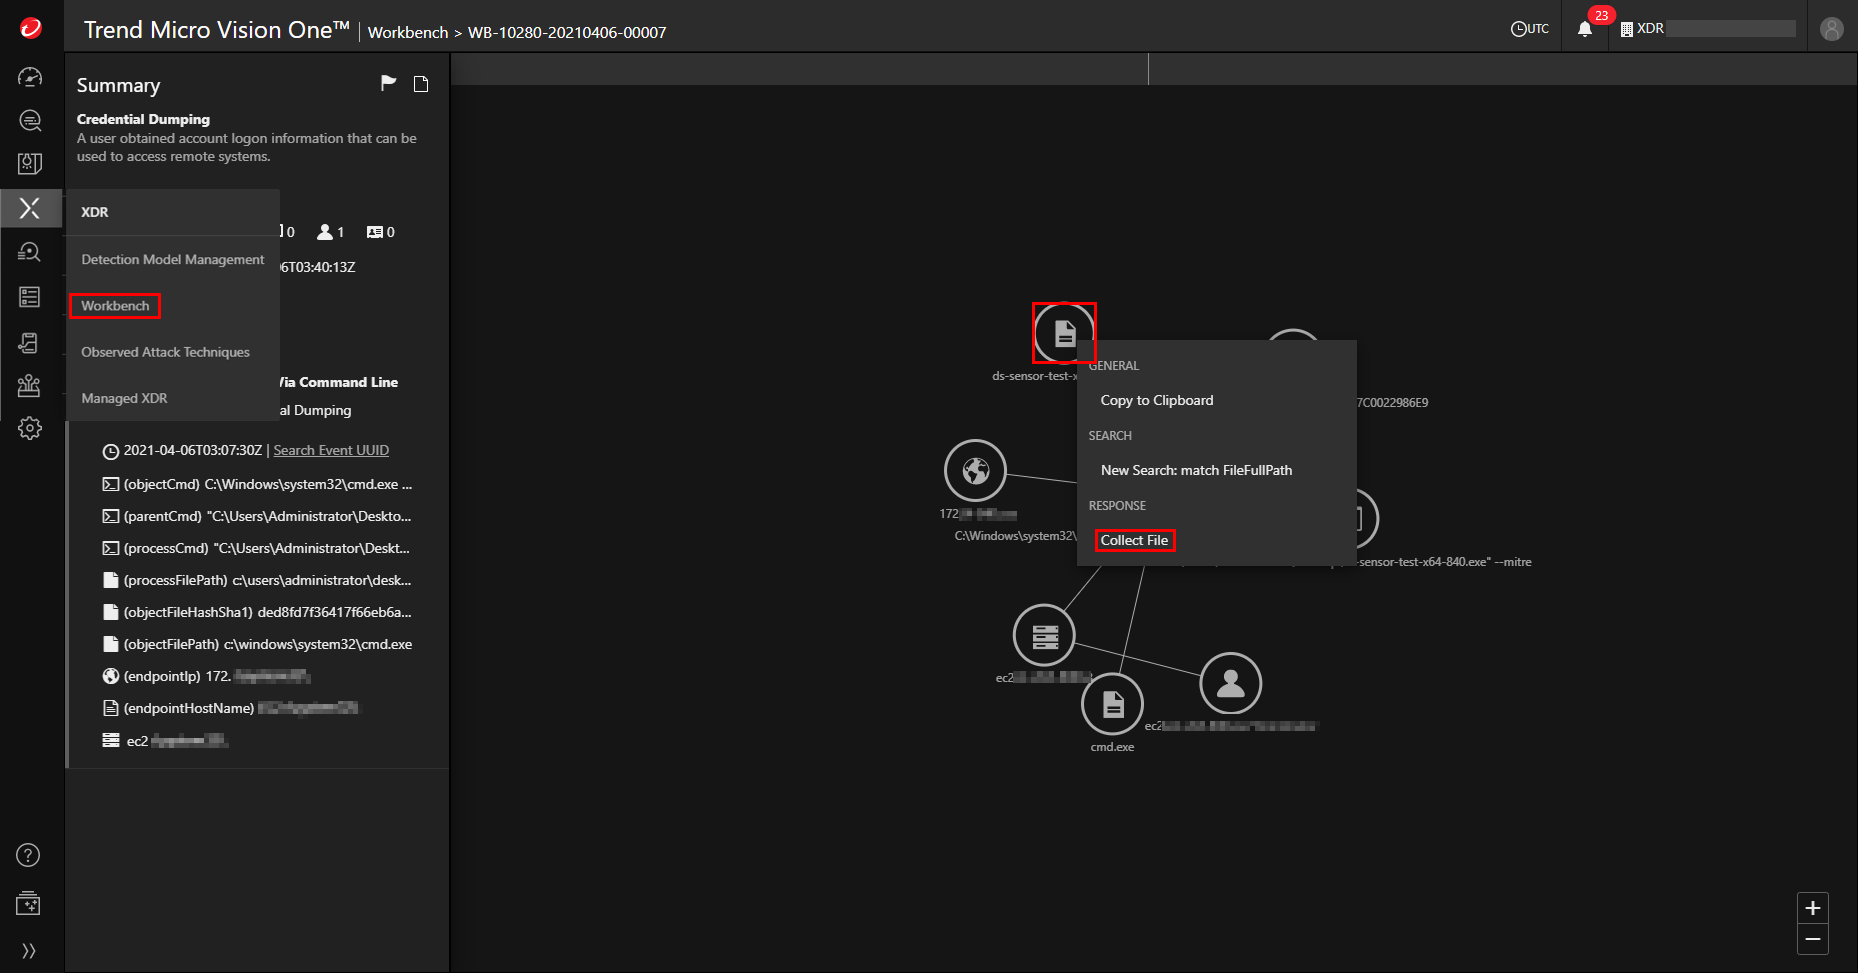
The Collect File Task window appears.
Create a File Collection Task
- From the Collect File Task window, select the checkbox for the task.
- Optionally, enter a description for the response or event.
- Select Create.
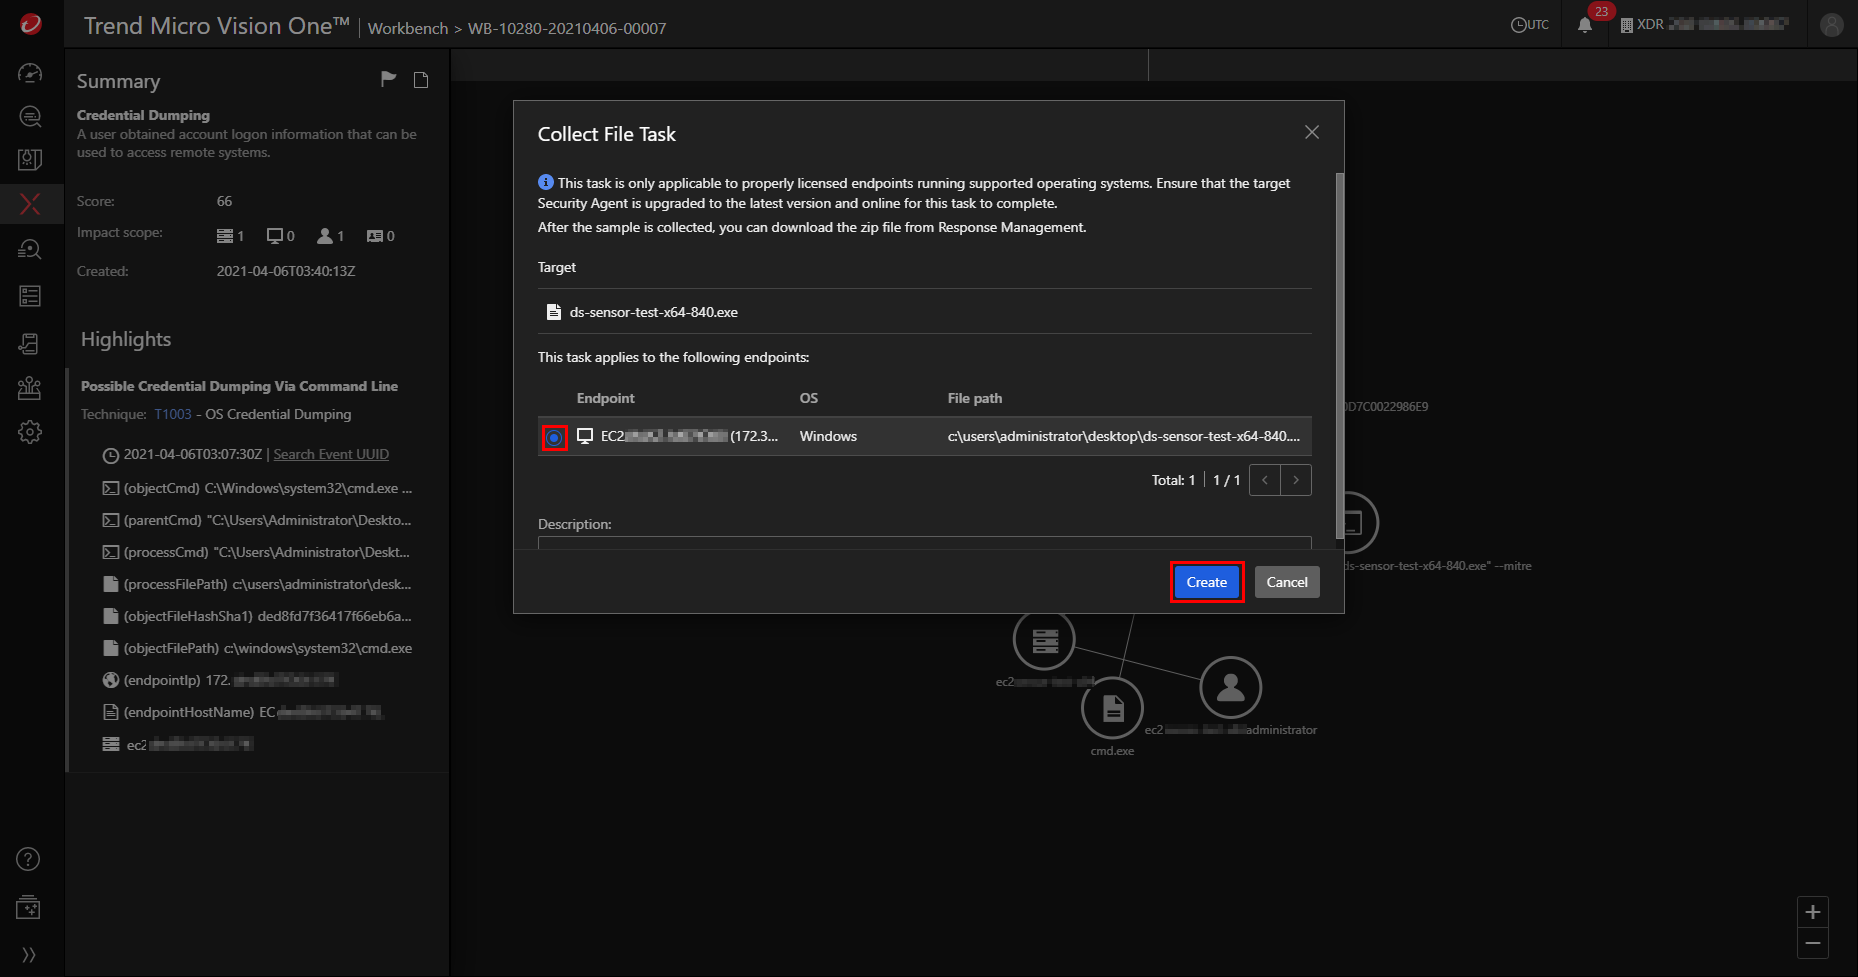
A Security Agent begins creating the task.
A Security Agent typically creates a collect file task within 20 minutes. If the Security Agent is offline, the task is queued until the Security Agent comes online.
Monitor task status
You can monitor tasks from the Response Management tab.
Task statuses include:
 In progress: Trend Vision One sent the command to the managing server and is waiting for a response.
 Queued: The server queued the command due to a high volume of requests or because the Security Agent was offline.
 Successful: The managing server successfully received the command.
 Unsuccessful: An error or time-out occurred when attempting to send the command to the managing server.
Download sample file
Downloading samples could harm your endpoint. Trend Vision One automatically stores sample files in a password-protected ZIP archive. Please ensure that you take the necessary precautions before continuing.
- In the Response Management tab, select Collect File from the menu and select download
 .
.
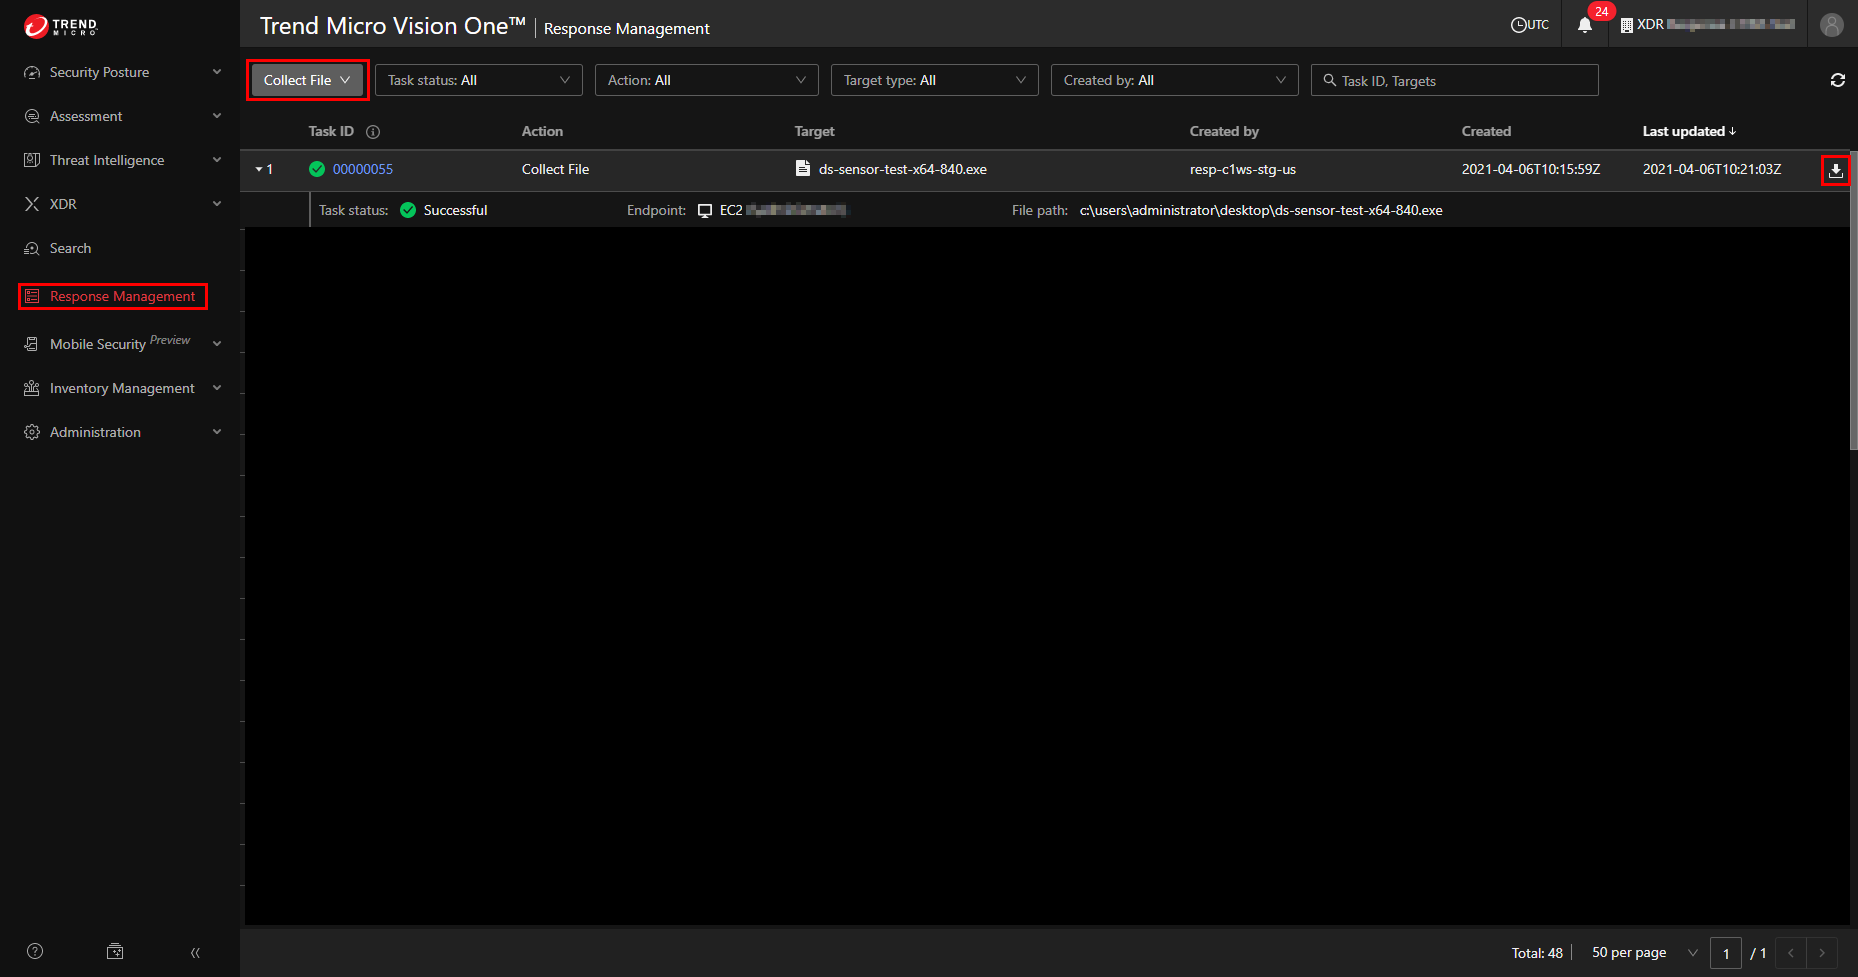
- In the dialog, select Download.
- In the Download File window, record the password for the archived sample.
- Select Download to download the file.

Troubleshoot common issues
To troubleshoot common issues with file collection, check the following settings in your Workload Security console:
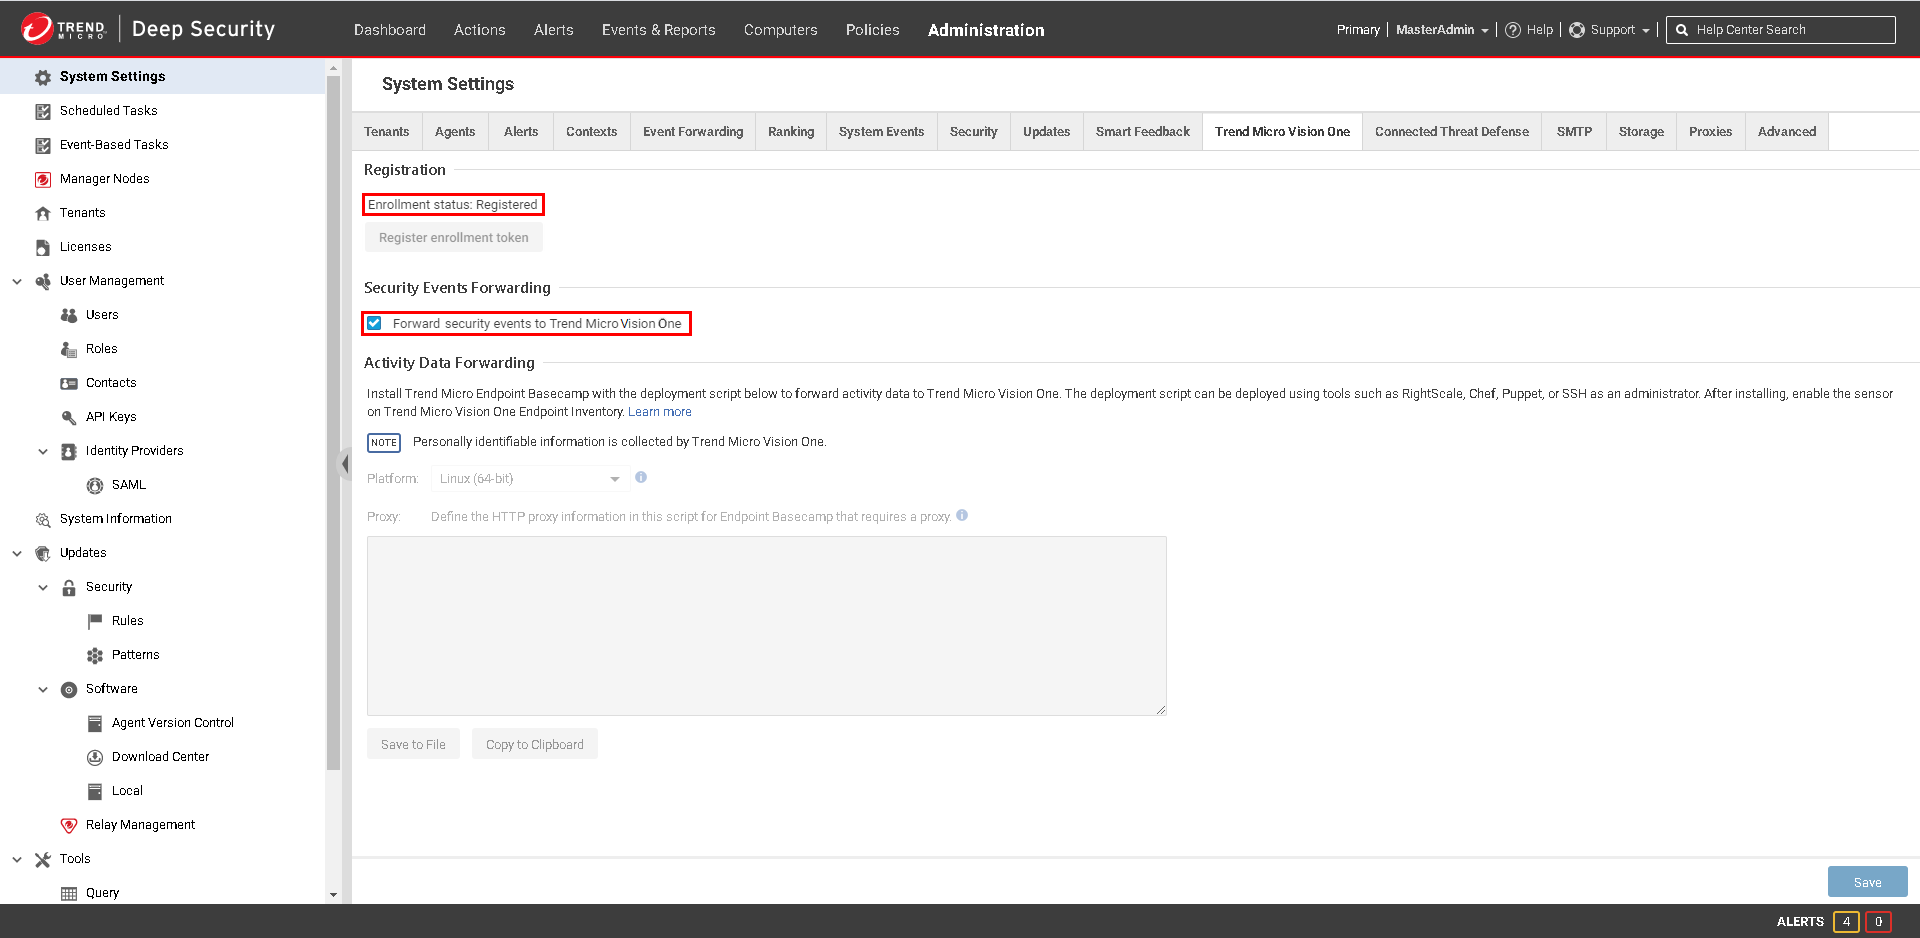
Trend Vision One settings
In the Trend Vision One (XDR) tab (Administration > System Settings > Trend Vision One (XDR)), make sure that:
- Enrollment status is Registered.
- Forward security events to Trend Vision One is selected.
Security module settings for your computers
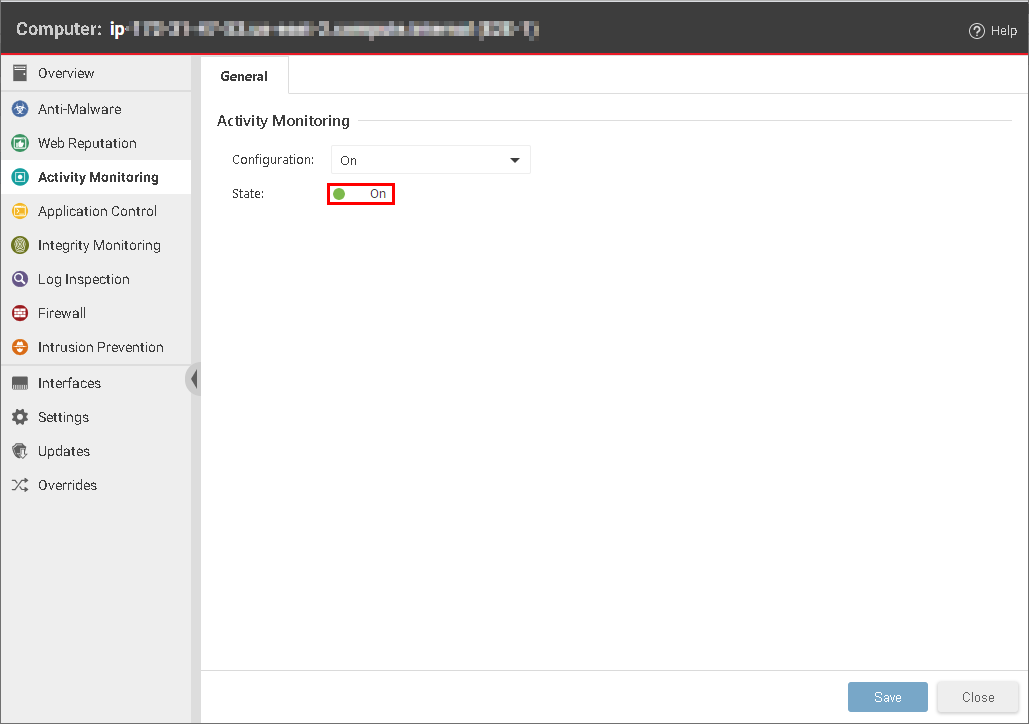
In the Activity Monitoring tab for your computers (Computers > (Right- or- double-click) Details > Activity Monitoring > General), make sure Configuration is set to On or Inherited (On).
You can also enable Activity Monitoring for computers by enabling it in the policy assigned to them. From the Policies tab, double-click the policy you want to enable Activity Monitoring for. Go to the Activity Monitoring > General and make sure that Activity Monitoring State is set to On.
If you have checked the requirements and troubleshoot common issues sections but are still experiencing problems, contact support.