Topics on this page
Deploy the all-in-one stack on Azure
Follow the procedure below to deploy the all-in-one stack into your Azure subscription.
-
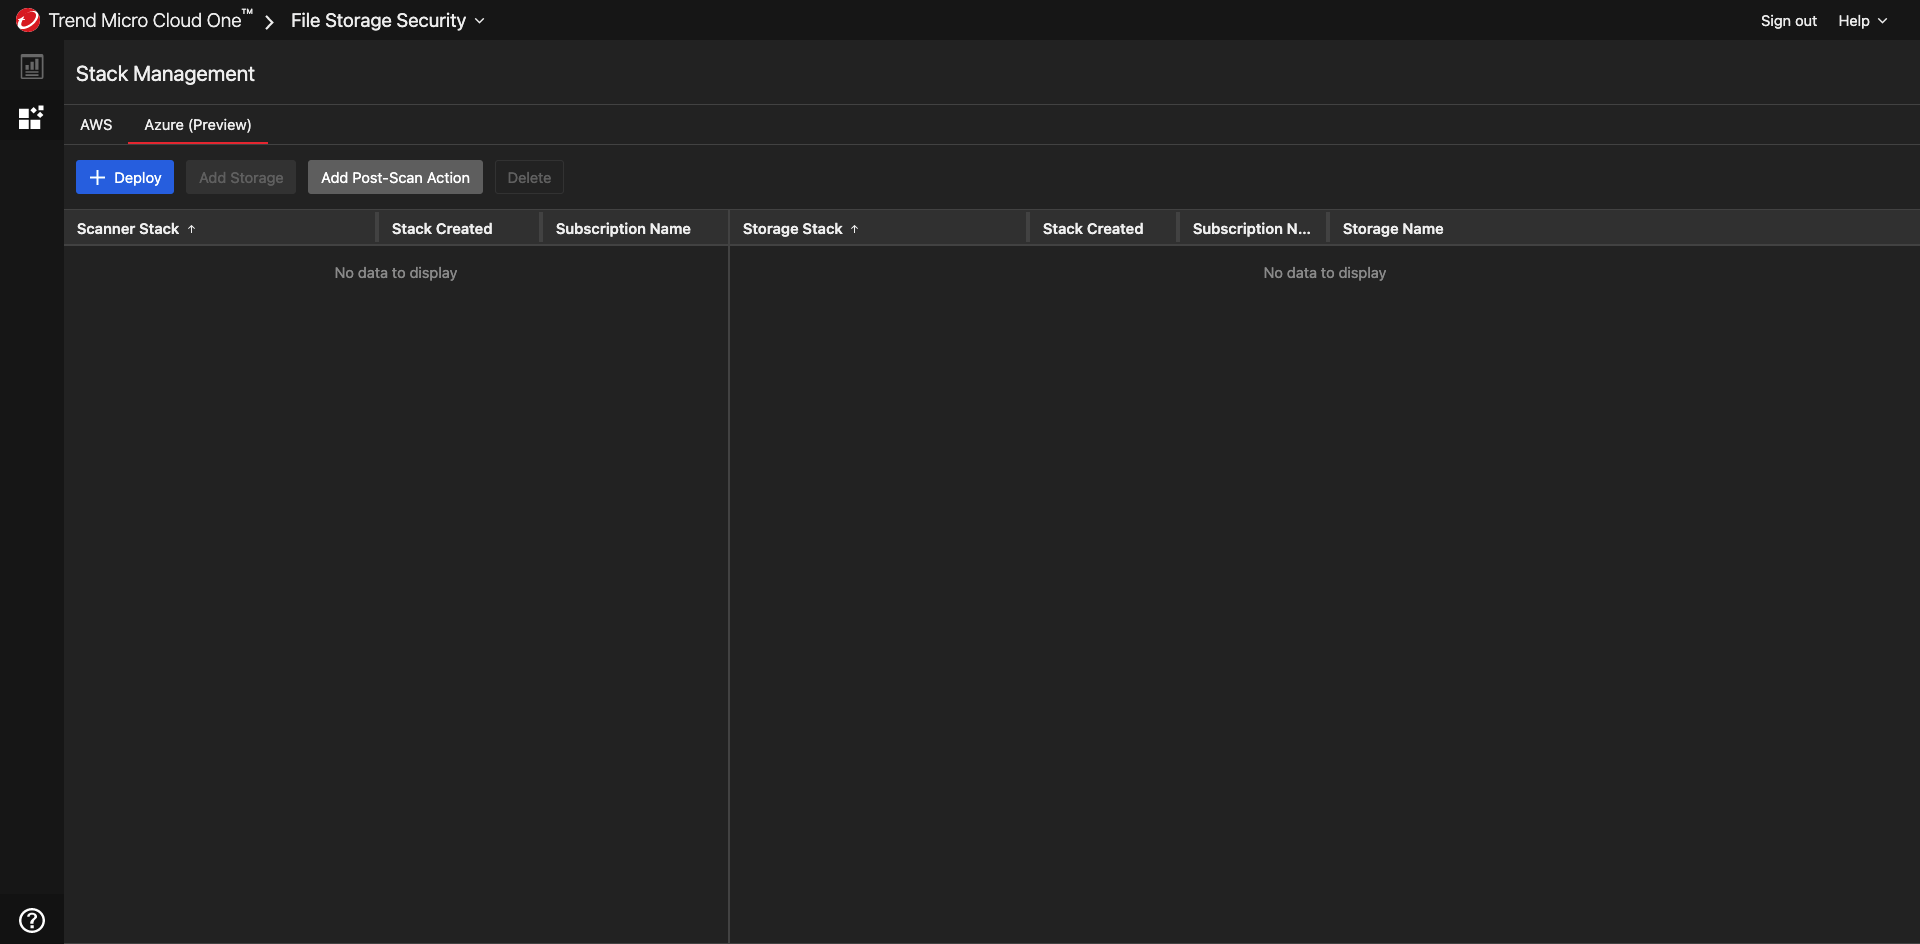
In the File Storage Security console, select the Stack Management page, select Azure tab, then select Deploy.
-
To deploy the all-in-one-stack, select Scanner Stack and Storage Stack.
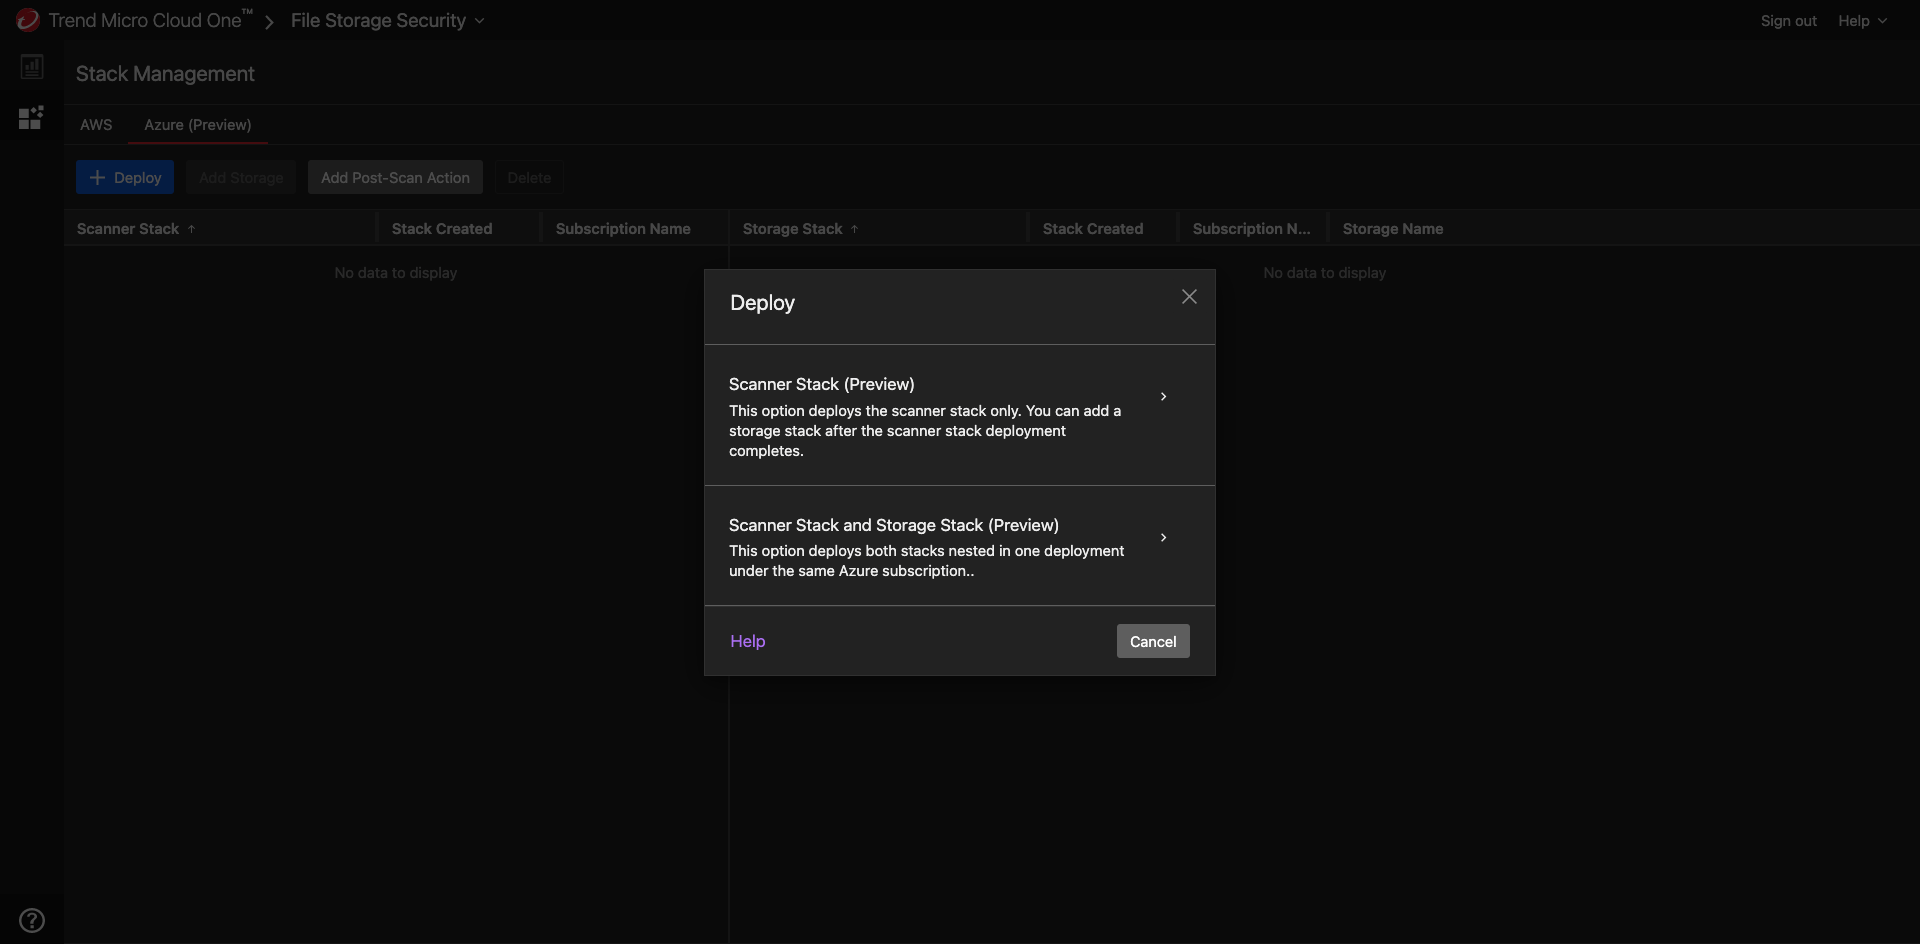
There is also the option to add a scanner stack by itself.
-
On the Deploy Scanner Stack and Storage Stack dialog box:
- For Step 1, make sure you're signed in to your Microsoft Entra ID on the Azure portal. Retrieve the Service Principal ID by executing the List Service Principal ID Azure CLI command. If the service principal does not exist, create the service principal by executing the Prepare Service Principal ID Azure CLI command. To deploy the stacks in Azure, you must use the Service Principal linked to File Storage Security's App Registration. For details on creating the service principal, see the Prepare Azure Service Principal
- (Optional) For Step 2, select Review Stack to view the contents of the all-in-one stack template before launching it.
-
Select Launch Stack.
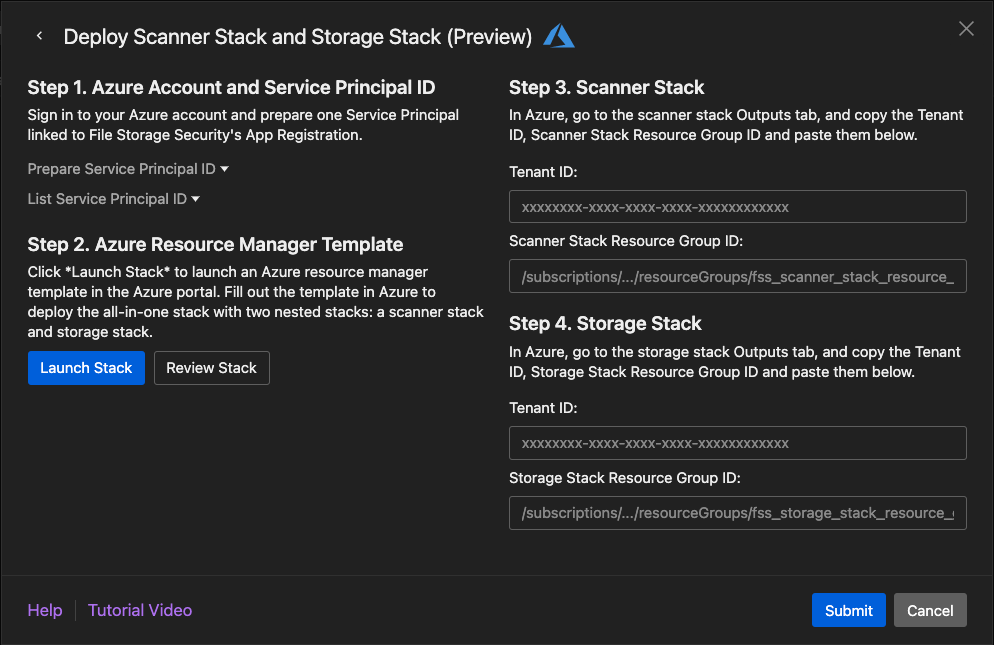
You are redirected to the Azure Custom deployment page.
-
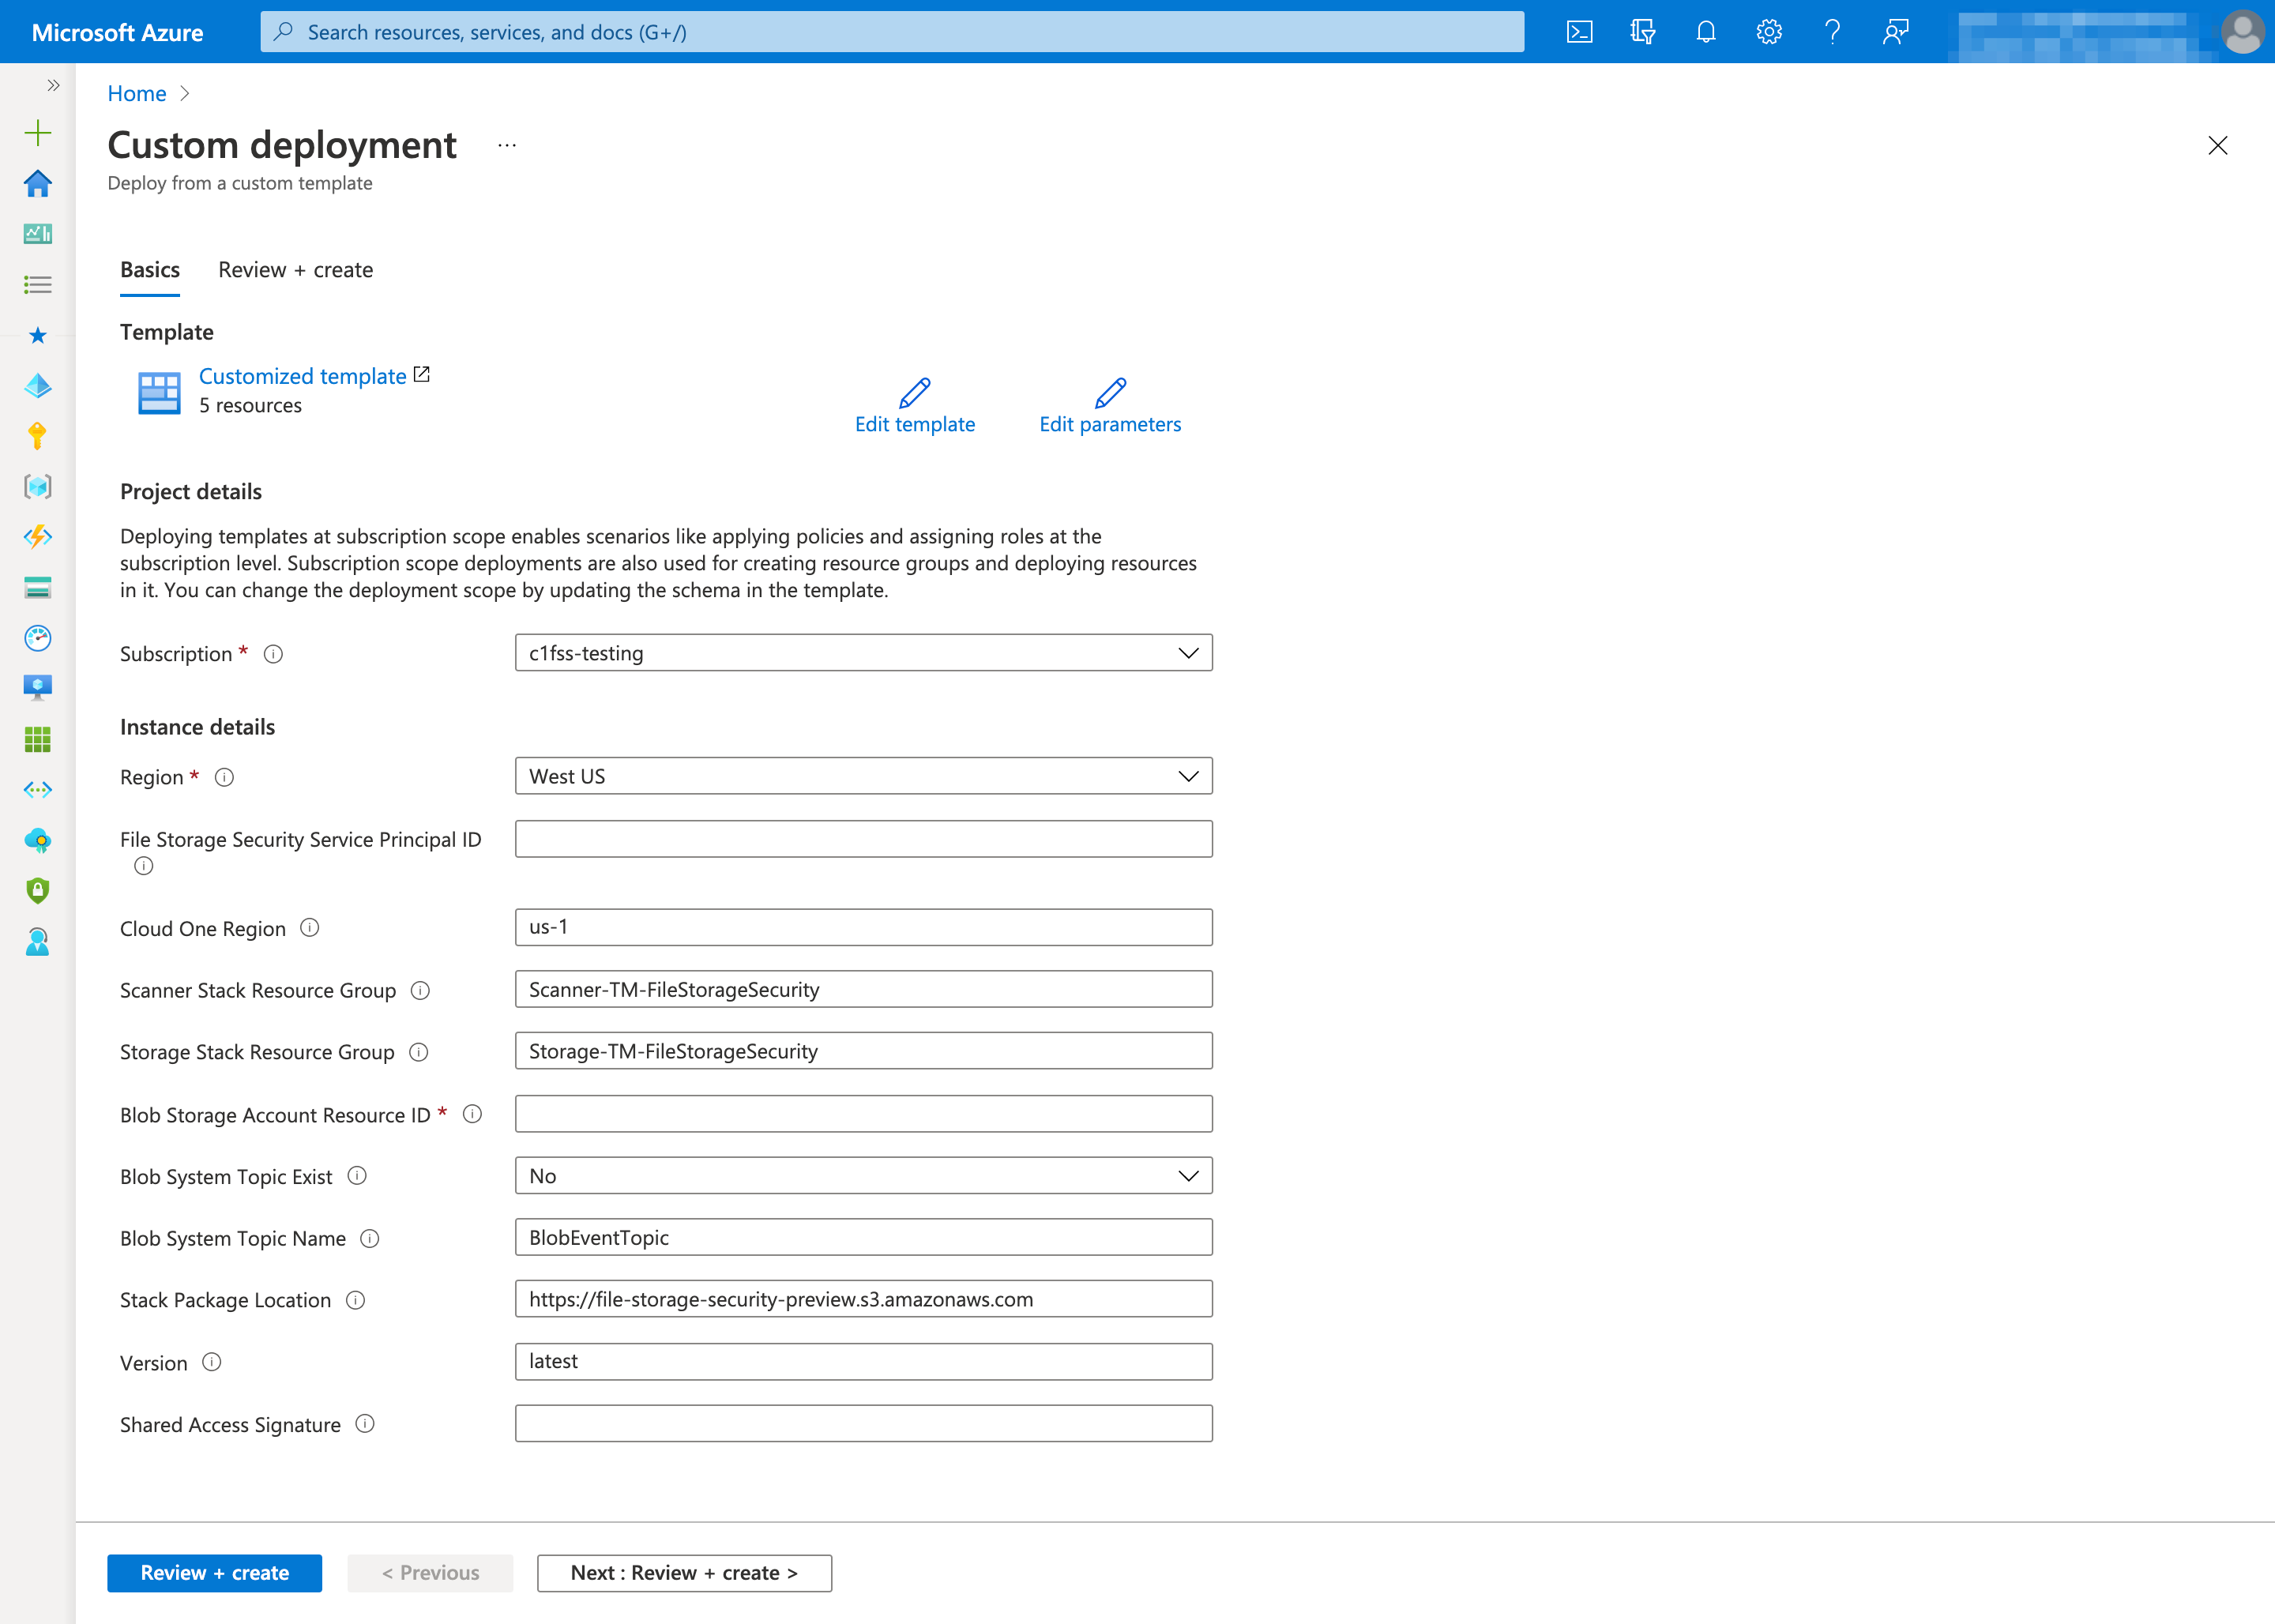
Fill out the Custom deployment page as follows:
- Subscription: Specify the subscription to deploy the stack.
- Region: Select the Azure region where you want to deploy the all-in-one stack. The region must be supported by File Storage Security. For details, see What regions are supported?
-
File Storage Security Service Principal ID: Specify the service principal ID retrieved in Step 1. You'll be granting this service principal permission to manage your all-in-one stack. More specifically, this service principal has permission to:
- Obtain the function logs for the storage and scanner stacks.
- Update the functions and license in the stacks.
- Send some of your organization's data to File Storage Security backend service. For details on the data we collect, see our Data collection disclosure.
-
Cloud One Region: Specify the region to which the scanner and storage stacks will connect to for Cloud One services such as the File Storage Security console, event management services, and telemetry services. For more information, see supported Cloud One regions.
- Scanner Stack Resource Group: Specify the name of the scanner stack.
Example:
Scanner-TM-FileStorageSecurity. - Storage Stack Resource Group: Specify the name of the storage stack.
Example:
Storage-TM-FileStorageSecurity. -
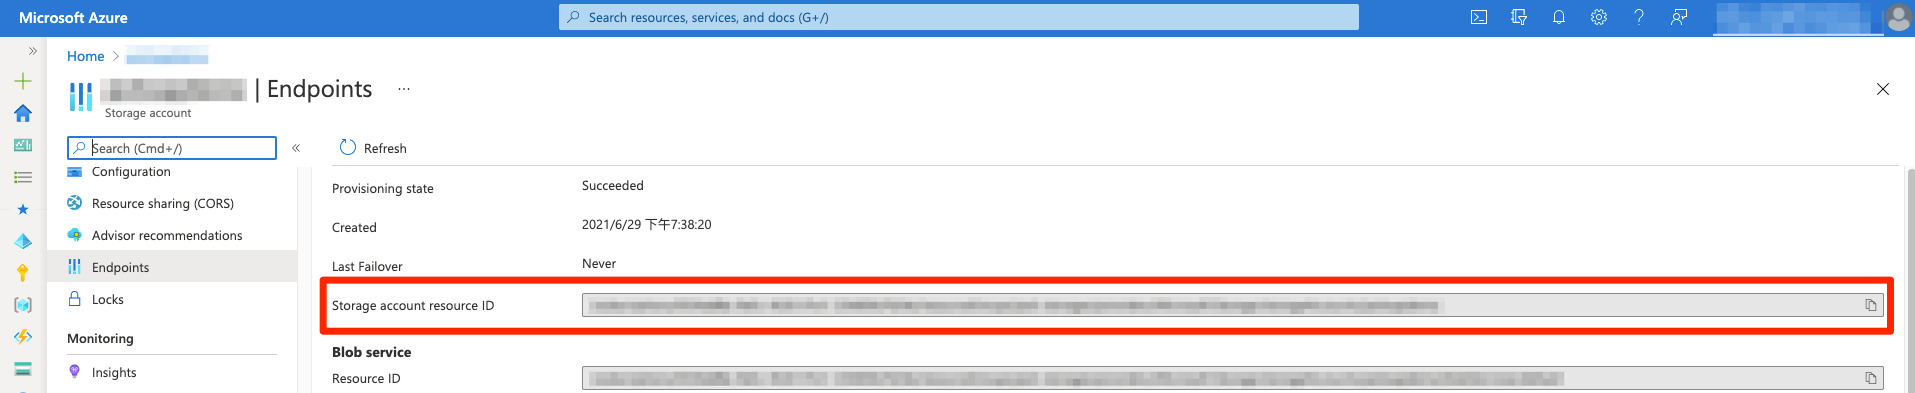
Blob Storage Account Resource ID: Specify the resource ID of your protecting storage account. You can only specify one storage account. For supported storage account types, see What services are supported?. Example:
/subscriptions/1234abcd-3c6d-4347-9019-123456789012/resourceGroups/storage-resource-group/providers/Microsoft.Storage/storageAccounts/protectingstorageaccount.The storage account resource ID can be found in Endpoints tab of the storage account's page.
-
Blob System Topic Exist: Select Yes if the system topic of the protecting storage account is already created. Select No to deploy a new system topic.
- Blob System Topic Name: The existing system topic name or the name of system topic to be created.
- Update Scan Result To Blob Metadata: Select Yes to update the blob metadata and index tag with the scan result. Select No to update only the blob index tag. If you are using premium block blob storage account that doesn't support index tags, we suggest that you select Yes to see the scan results on blob metadata.
- Report Object Key: Select Yes to report the object keys of the scanned objects to File Storage Security backend services. File Storage Security can then display the object keys of the malicious objects in the response of events API.
- Stack Package Location: Leave this field as-is. It is for internal use by File Storage Security.
- Version: Leave this field as-is. It is for versioning.
- Shared Access Signature: Leave this field as-is. It is for accessing Stack Package Location when it resides in Azure storage account.
- Select Review + create.
- Confirm the information are correct and select Create.
-
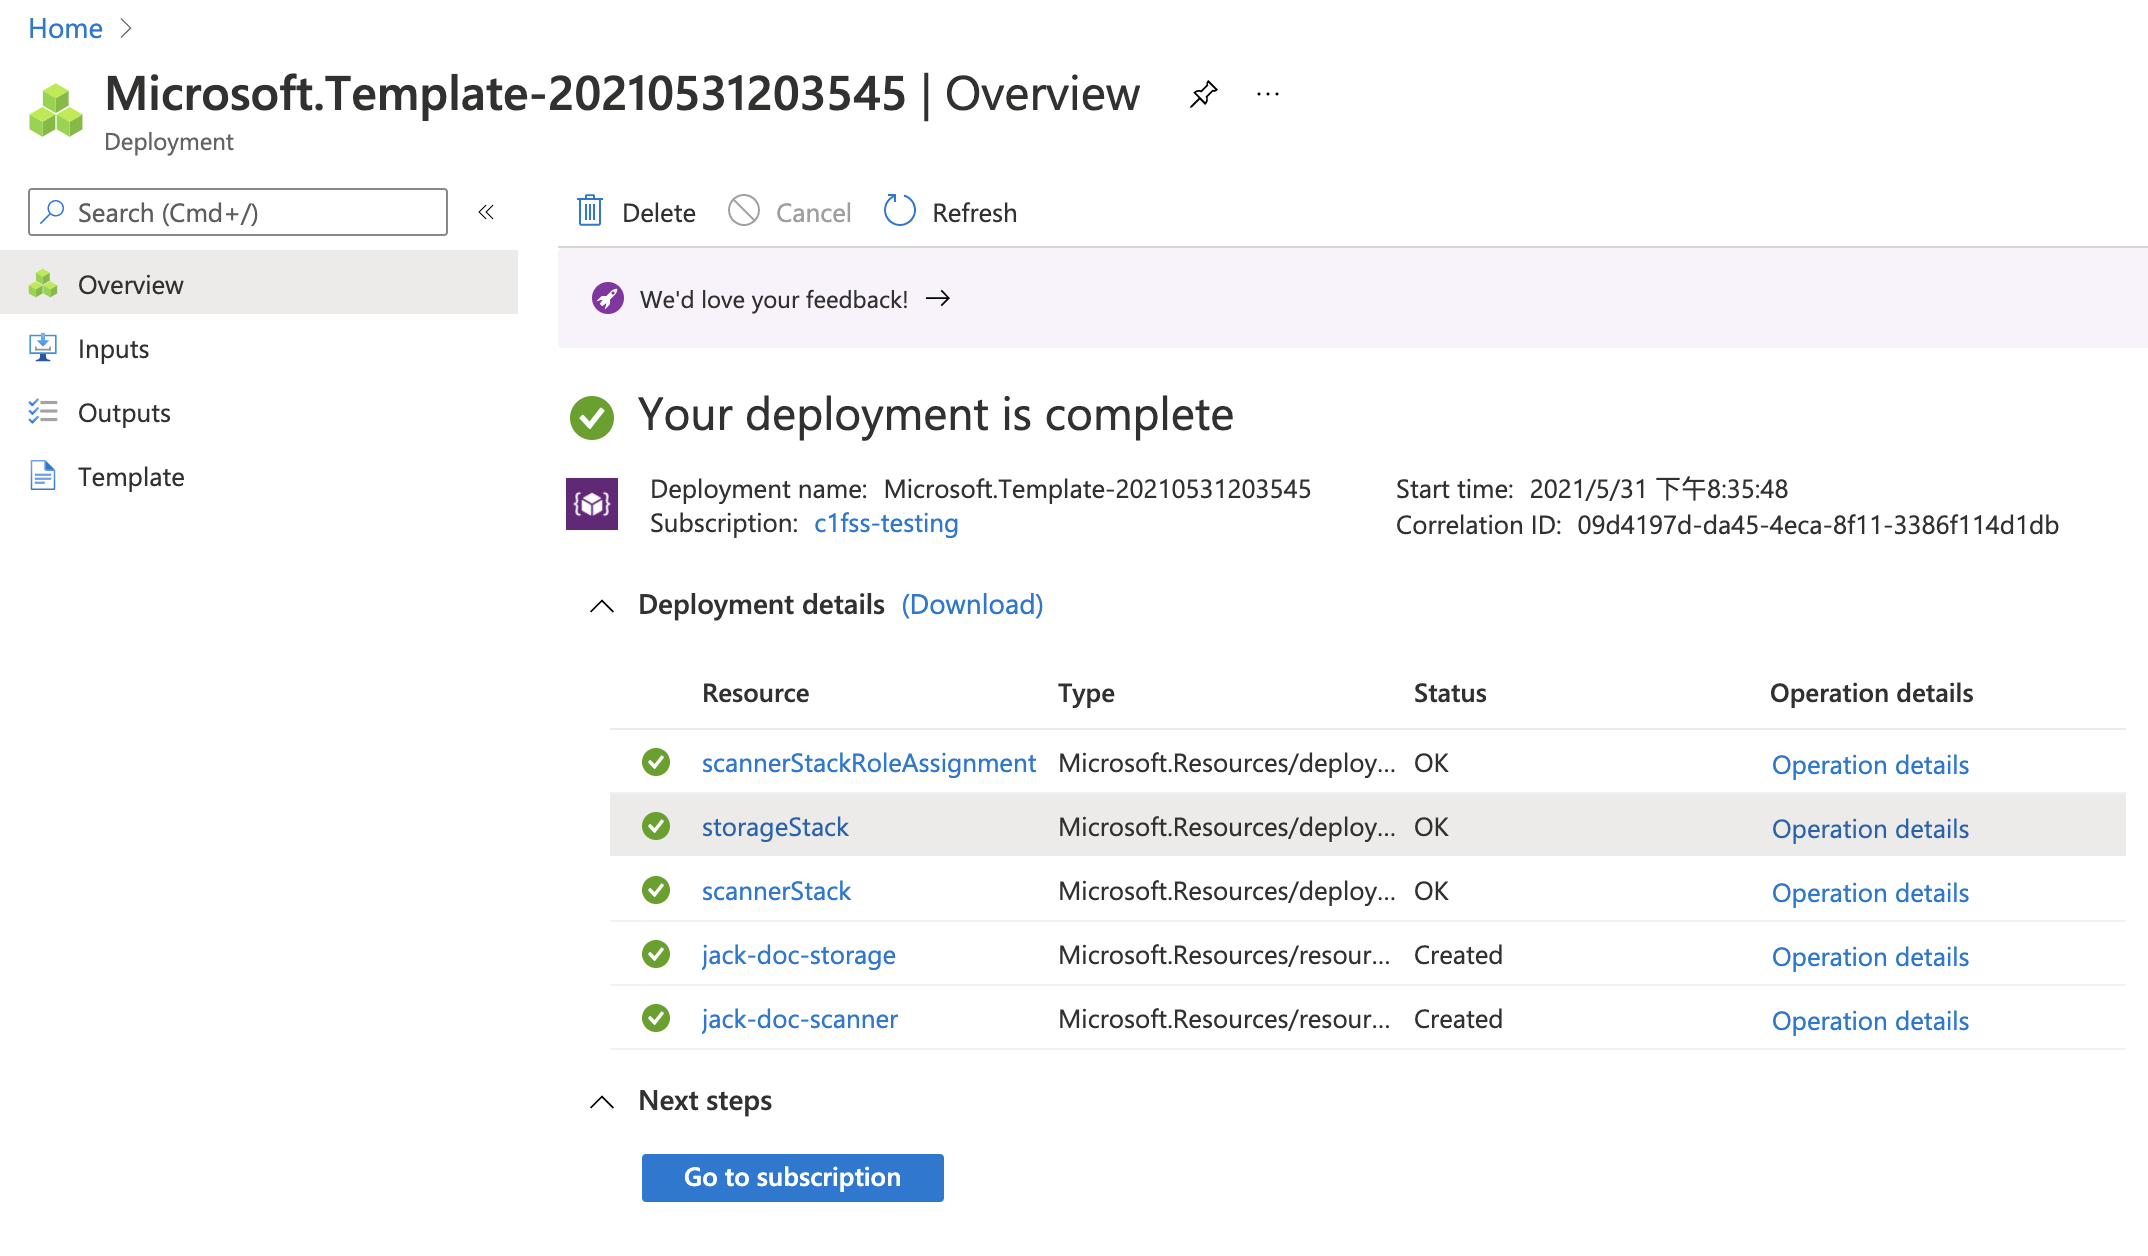
Wait while the stacks are installed. This could take several minutes. You'll know when everything is installed when you see three Your deployment is complete messages for the File Storage Security stacks.
You have now installed the all-in-one stack. Continue to the next section to configure Azure stack.