Topics on this page
Configure SAML single sign-on
When you configure Trend Cloud One to use SAML single sign-on (SSO), users signing in to your organization's portal can seamlessly sign in to Trend Cloud One without another credential check.
Typically, there are two people required to configure Trend Cloud One to use SAML single sign-on (SSO): a Trend Cloud One administrator and an administrator for the identity provider.
Trend Cloud One uses the SAML 2.0 protocol for authentication and has been tested with the following identity providers:
- Active Directory Federation Services (ADFS)
- Microsoft Entra ID
- Okta
In addition, any other identity provider compliant with SAML 2.0 is expected to function with Trend Cloud One.
| Step | Performed By |
|---|---|
| Download the metadata XML for Trend Cloud One | Trend Cloud One Administrator |
| Configure SAML providers | Identity provider Administrator |
| Configure SAML In Trend Cloud One | Trend Cloud One Administrator |
Download the metadata XML for Trend Cloud One

- Log in to Trend Cloud One with Full Access to the Identity and Account permissions.
- Click Administration near the bottom of the page.
- Click Identity Providers on the left.
- Click Download Metadata XML for Trend Micro Cloud One, or right-click the link and select an option to save the file.
This XML file will be used in order to configure SAML. You will use a different XML file to upload into Trend Cloud One later.
Configure SAML identity providers
Configure SAML in Trend Cloud One
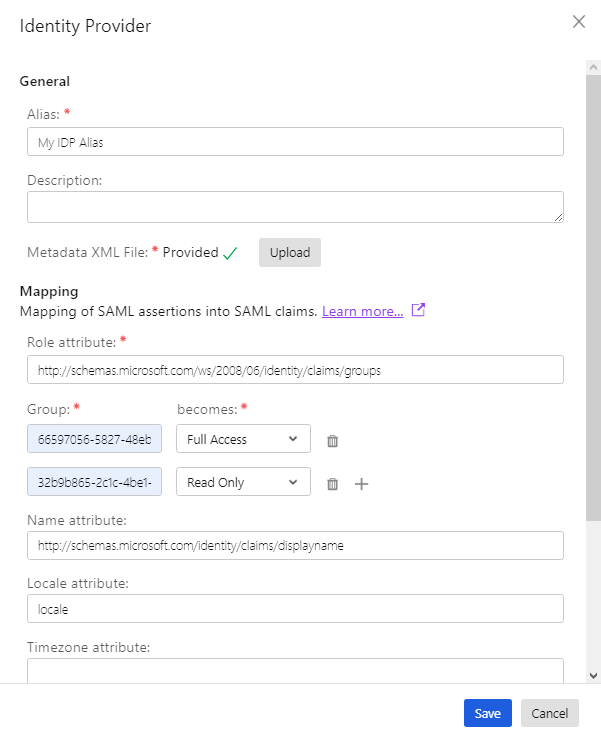
- From the Identity Providers page, click New.
- In Identity Provider, type a Name. This name should include the identity provider such as Microsoft Entra ID or Okta.
- In Metadata XML File, click Browse, then navigate to the metadata file that you downloaded from the identity provider (not Trend Cloud One).
- For the Mapping section (see explanation in About SAML single sign-on) provide a role and attribute as detailed in the identity provider specific guides.
- Click Save.
In the Mapping section, click + to add more than one Group. You can configure multiple groups to have different access privileges.